How to Practice Good Marksmanship Without Wasting Ammo – My Comments
(:E-:N-:R-AZ:C-30:V)
[Another way to practise is to use non-lethal weapons. Get practise. I'm also practising. Learn how to shoot. And that includes the ladies too, where possible. Jan]
Buying a gun and hitting the range once or twice a year is not good prepping discipline. A firearm is an important part of most preppers’ kits. But knowing how to use your gun quickly and accurately under stress, when it counts, is what matters most.
Practicing good marksmanship frequently – we mean on a weekly, even daily basis – is the only way to get confident behind the trigger. But we get it, ammo is expensive. And in times of civil unrest or outright disaster, every round counts. Finding time to go to the local range is never easy, either.
You need to train nonetheless. You can practice certain shooting drills without wasting ammo. In fact, there are plenty of drills you can practice that require no ammo at all. This article will show you how.
Related: Frugal Prepping: How to Get Cheap and Reliable Ammo For SHTF
Shooting Drills that Don’t Require Ammo
Warning: Practicing these drills effectively means dry-firing your weapon. You must ensure your weapon is free of live ammo. For dry-fire exercises, we strongly recommend using a snap cap in your gun. A snap cap is a fake rubber or plastic bullet with no primer or propellant. Dry-firing your weapon empty will damage it. A snap cap eliminates this risk.
#1. Trigger Squeeze Practice Drill
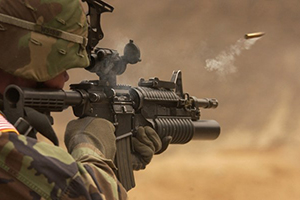 This is a shooting drill that sounds silly, but it’s incredibly effective at teaching consistent trigger squeeze and keeping a good sight picture through your shot. Even the U.S. Military uses it to teach new recruits trigger squeeze and sight picture without wasting rounds at the range.
First, grab a penny. Next, grab the pistol or rifle you want to practice with. This can be done prone, kneeling, or standing. We recommend practicing standing – it’s the most likely scenario you’ll find yourself in.
Make sure your weapon is empty. Load your snap cap.
With your weapon ready to dry-fire, place the penny atop the barrel, as close to the muzzle as possible. Assume a good shooting stance with your feet approximately the same width as your shoulders, facing your target.
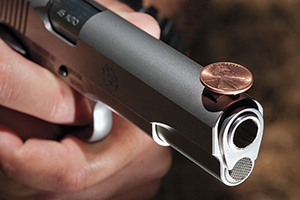
Aim, and grab a sight picture. Start practicing your trigger squeeze, working your way through the pull until it breaks and you fire. If you’re practicing good trigger squeeze and sight picture discipline, you should be able to break the trigger with your sights on target, without the penny falling off the barrel.
Trigger Squeeze Tips & Tricks
If the penny falls off the barrel, don’t get frustrated. It takes a lot of concentration, steady hands, and a perfect squeeze to keep the penny from falling. If you’re using a handgun with a flat slide and find this too easy, stack four or five pennies atop each other.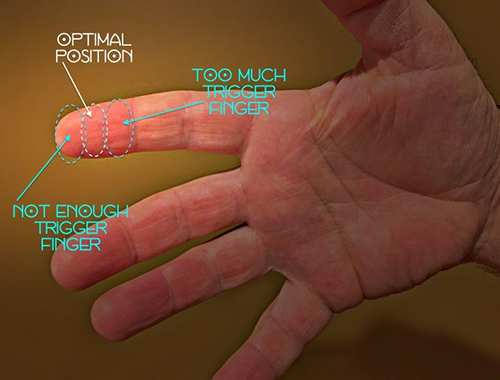 If you’re pulling your barrel to the left, then you’re probably doing one of these four things:
- You’re pushing into the gun, anticipating recoil;
- Your trigger finger isn’t on the trigger enough;
- You’re tightening all your fingers while squeezing;
- You’re jerking the trigger instead of smoothly pulling it.
And if your barrel’s falling to the right, you might be doing one of these things:
- You’re squeezing your thumb around the grip while pulling;
- You’re pulling the trigger with the joint of your finger;
- You’re tightening your entire grip while pulling;
- You’re heeling, or pulling away from the gun, anticipating recoil.
Keep in mind, these “symptoms” are reversed for left-handed shooters.
Related: Firearms for Emergency and SHTF Situations
#2. The Quick-Draw Drill
You can’t effectively dispatch a threat when the clock’s ticking, if you can’t get to your weapon quickly and safely. You need to practice and master a good quick-draw. Your attacker isn’t going to give you fair warning.
This drill can be performed with or without dry-firing. We strongly recommend following through with a dry-fire shot with each draw. This will help to work the entire process of defensive shooting into your muscles and bones. Trust us when we say this: if you ever must pull the trigger to defend yourself, you’ll be operating largely on instinct and muscle memory.
Again, make sure your weapon is empty. Load your snap cap.
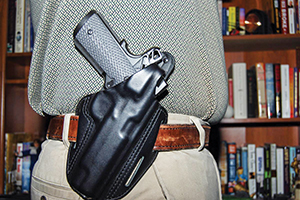 Now, it’s time to start practicing your draw. Don’t rush into this. Practice each step, first. The point is to first make sure your weapon and holster are set up correctly. If you don’t, you’ll be practicing poor marksmanship and reinforcing bad (possibly deadly) behaviors.
First, Check Your Holster Setup
Before quick-drawing, make sure your shooting arm and fingers can move quickly and naturally to the grip of your gun. How does the initial grab feel? Can you get at least three fingers around the grip and your palm on the back of the grip quickly?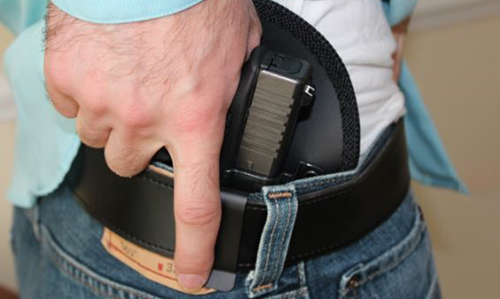
Can you keep your face, head, and shoulders toward your target while you draw? Or does your holster placement force you to bend weirdly? Are you rotating your upper body, wasting precious time?
You should be able to draw while facing your target and leaning forward just slightly, approaching a shooting stance as you draw. It’s all about holster position:
Tips for Holster Position
Most professional shooters carry at the 4 o’ clock position, or 6 o’ clock for lefties. We agree. We also recommend against keeping your holster at your side or in the small of your back. Both these positions require you to bend, and flex and twist your arm needlessly.
Quick-Draw Best Practices:
- The only part of your body that should be moving while you draw is your arms;
- Maintain a planted stance with your feet spread the same width as your shoulders;
- Your body should be squared up with your target. You shouldn’t be angled left or right;
- You should be rotating the muzzle toward the target as soon as it clears the holster;
- Practice gpreacherng a sight picture while you’re extending your arms outward to aim.
Just by practicing these two drills and following their best practices, you’ll be working toward cementing all the fundamentals of good marksmanship into your muscle memory. But this alone isn’t enough.
How to Conserve Ammo While Practice Shooting
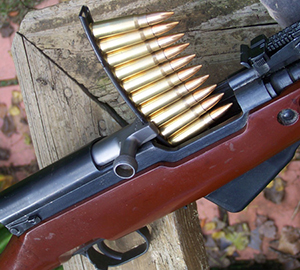 Even though we’re talking about conserving ammo, every good shooter needs to practice with live rounds. Again, muscle memory takes over when the time comes to defend yourself. Your body needs to be used to dealing with recoil, noise, and performing good marksmanship with live rounds.
There are a few simple best practices you can do to conserve ammo at the range and still get the most out of your training.
Zero Your Rifle for 109 Yards (100 Meters)
No matter what rifle you’re using, the 109-yard (100-meter) zero is the fastest, easiest, and most intuitive zero for rapid engagement of threats. It’s what the U.S. Military prefers for its rifles, and it’s what works well in the real world.
Can your rifle reach out and touch targets at 328, 437, even 765 yards? Perhaps. But you’re not facing any imminent threat or quick attack at these distances. In fact, military data across the globe says nearly all firefights happen at less than 200 yards. Most hunters take their shots at 160 yards or less. A “SHTF” situation involving your own firepower will certainly be no different.
Why the 109-Yard (100-Meter) Zero?
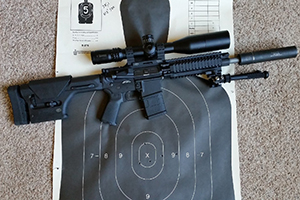 Shooters with experience like to stick to their own opinions, and we realize this can be a touchy subject. Let us explain: the AR-15, chambered in 5.56/.223 with a 16” barrel, is by far one of the most common rifles bought and used by preppers. We will soon be writing an article on how to use an 80% lower receiver to build an unregistered survival rifle.
Using this rifle as our example, we get a few benefits with this zero:
- The trajectory of the bullet will never rise higher than your line of sight;
- The bullet only rises by 2.3” from point of aim between 0 and 54 yards;
- The bullet only rises by 1.3” from point of aim between 27 and 60 yards;
- Point of aim is almost identical (less than 1”) to point of impact up to 191 yards.
Basically, the 109-yard (100-meter) zero guarantees incredible accuracy up to almost 218 yards. That means your point of aim (POA) and point of impact (POI) will be almost identical for nearly any threat or engagement. This same ballistic data will be quite similar for many intermediate-cartridge semiautomatic rifles.
This zero allows you to focus on sight picture, aiming, trigger squeeze, and the fundamentals of good marksmanship without having to worry about hold-over, elevation, or adjusting your POA to compensate for distance.
Related: The Complete Guide To Cleaning And Lubricating Your Ar-15
For Handguns, Zero at 16 Yards (15 Meters)
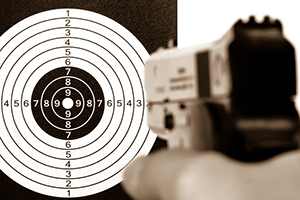
Again, touchy subject, but hear us out. There are two reasons why we recommend using a 16-yard zero for nearly all handguns:
#1. FBI crime statistics say most shootings happen at just a few feet (which isn’t true). The only study conducted that detailed the average distance of gunfights was done by Police Marksman in the 90’s. They found the average distance of a gunfight was 15 yards.
#2. For most ammo, especially 9mm Parabellum, a 16-yard zero will yield excellent accuracy with a nearly-flat trajectory out to 54 yards.
If we use 9mm Federal 124-grain HST ammo as an example, these are the differences between POI and POA for the most common zeroes:
| 11 yards (10 meters) | 16 yards (15 meters) | 27 yards (25 meters) |
| 109 yd (100m): -6.4” | 109 yd (100m): – 8.3” | 109 yd (100m): – 9.1” |
| 27 yd (25m): + 0.7” | 27 yd (25m): + 0.2” | 27 yd (25m): + 0.0” |
| 55 yd (50m): + 0.4” | 55 yd (50m): – 0.6” | 55 yd (50m): – 1.0” |
| 82 yd (75m): – 1.9” | 82 yd (75m): – 3.4” | 82 yd (75m): – 4.0” |
Remember, the only real data we have says most shootings occur at 15 yards, so simple logic says 16 yards is the best zero. Comparing all three, we can also see a 16-yard zero provides a POA and POI that are closest to 27 yards, with about half an inch of difference up to 54 yards.
The same logic about the rifle zero applies here: a 16-yard (15-meter) handgun zero will allow you to focus on the marksmanship fundamentals instead of worrying about hold-overs, elevation, and POI vs. POA.
Related: How Much Ammo Should You Stock Pile?
Final Tip: Practice Shot Placement in Groups of Three
Every live round you fire at the range should serve a purpose. This is the only way to truly conserve ammo. To get the most out of every shot – and to easily check your accuracy and fundamentals with as few rounds as possible – we recommend using three-shot groupings.
A three-shot grouping allows you to triangulate the average point of impact between all three rounds and thus, your average point of aim. Four shots aren’t necessary for this. And if a third shot is a “flyer” or runs off-target, you still have two rounds on target to average out where your point of was when you were firing correctly.
The short-n’-sweet:
- Practice your trigger squeeze, aim, and sight picture by stacking a penny on the barrel of your weapon. Practice dry-firing using this exercise. Always use a snap cap when dry-firing.
- Practice quick-draw drills to make sure your holster and handgun are set up appropriately. Dry-fire with a snap cap to practice target acquisition while drawing.
- When at the range, we recommend a 109-yard (100-meter )rifle zero, and a 16-yard (15-meter) handgun zero.
- Practice shot placement and live fires with groups of three rounds. No more, no less.
- Source: https://www.askaprepper.com/how-to-practice-good-marksmanship-without-wasting-ammo/
European Outlook
This is a website run by an excellent British man that I know who is a true racialist. He puts out good, solid content.
Video: LIBERALS104: Secret Liberals aka Crypto Liberals
I discuss the topic of real Liberals who are hidden. Other Liberals know about them, but the secret is well kept.
Video: Liberals as a CANCER in Western Society: How Liberals DISTORT Society
There are Liberals who have referred to People as a Cancer. I look at Liberals as a Cancer inside society.

